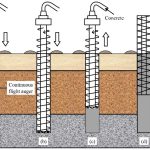
Rotary drilling rig power head disassembly is a critical maintenance operation that directly affects equipment safety, service efficiency, and component lifespan. Improper disassembly may lead to hydraulic contamination, component damage, or serious safety risks.
This guide provides a standardized and safe procedure for drilling rig power head disassembly. By following the same steps in reverse order, this guide can also be used as a practical reference for power head installation, making it suitable for both maintenance, disassembly, and reinstallation operations.
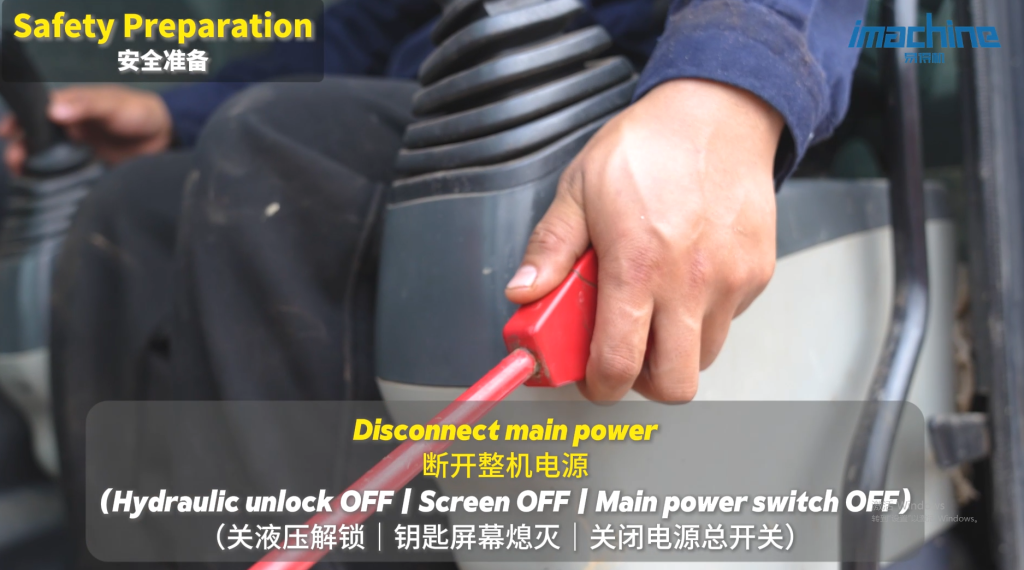
Safety Preparation Before Power Head Removal
Before starting the power head disassembly, ensure the machine is parked in an open and stable area.
Safety preparation steps:
- Park the machine on level ground with sufficient operating space
- Shut down the engine and remove the ignition key
- Disconnect the main power supply of the rig
- Ensure hydraulic unlock is switched off and all screens are powered down
Proper power isolation is essential to avoid unexpected movement or hydraulic pressure during disassembly.
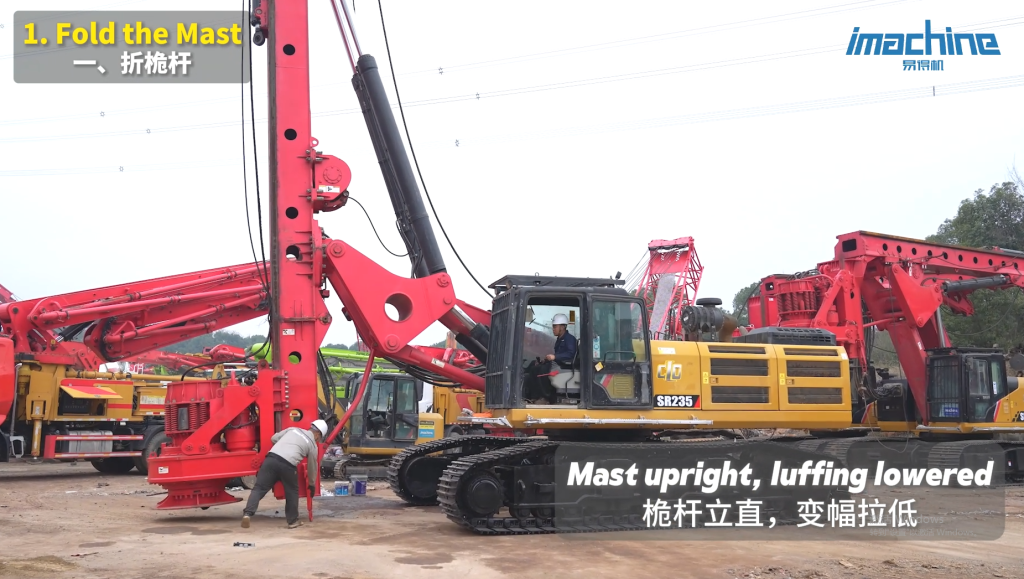
Step 1: Folding the Mast for Rotary Drilling Rig Power Head Removal
Correct mast positioning is a key step in rotary drilling rig power head disassembly.
Operating procedure:
- Keep the mast in a vertical position
- Lower the luffing system
- Loosen the bolts connecting the middle mast and the lower mast
- Note: There are a total of 11 bolt sets at the connection point
- Slowly fold the middle mast to a horizontal position
- Lower the luffing cylinder to its minimum position to allow hose removal
Important note:
The mast can only be folded after the lifting cylinder rises above the cab height.
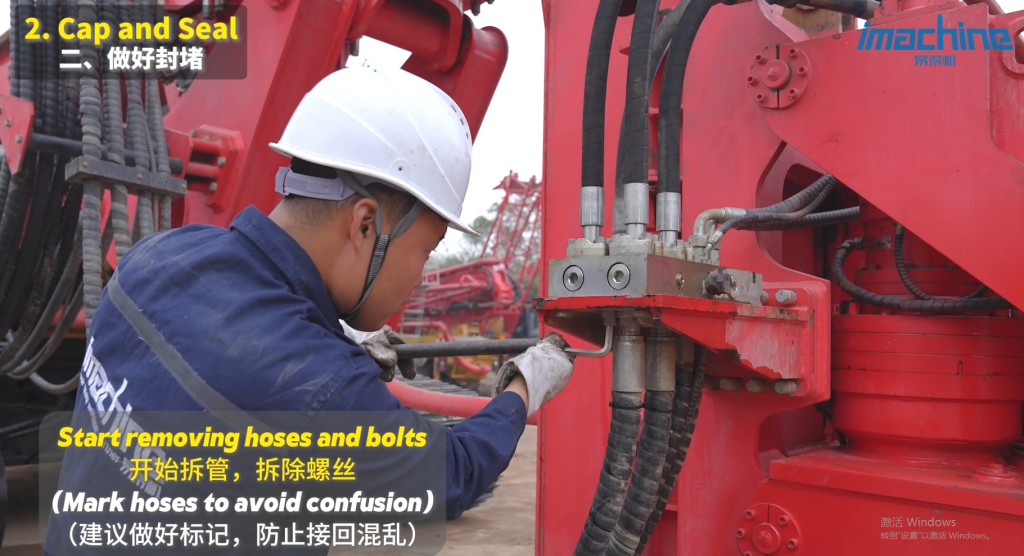
Step 2: Sealing the Hydraulic Lines
Before removing hydraulic hoses, prepare suitable containers to collect residual hydraulic oil and prevent environmental contamination.
Hydraulic line disassembly steps:
- Remove hydraulic hoses carefully
- Mark each hose clearly to avoid incorrect reconnection
- Install sealing plugs and cover plates
- Seal all hydraulic lines securely to prevent oil leakage and contamination
Proper sealing is crucial for maintaining hydraulic system cleanliness after the power head disassembly.
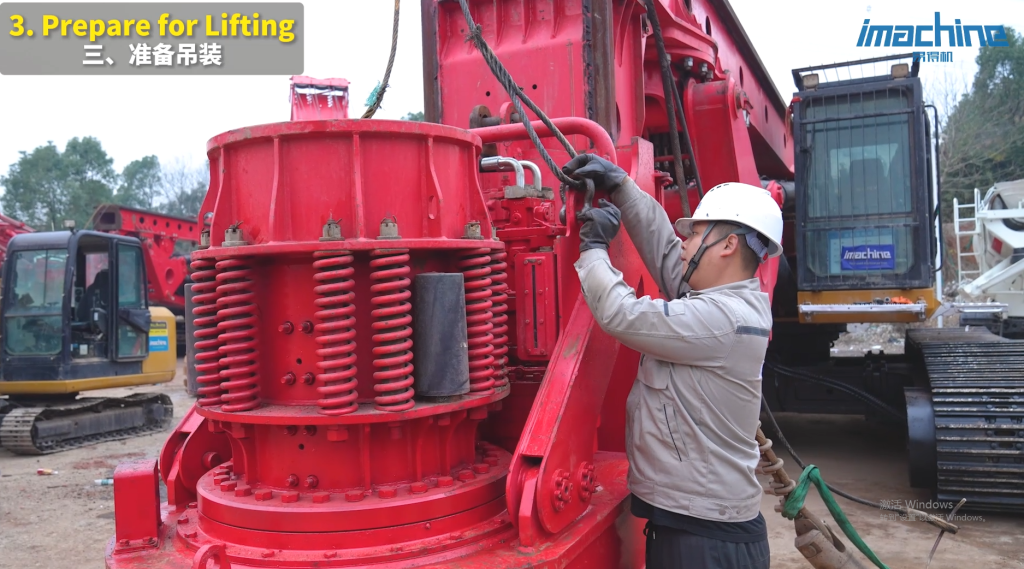
Step 3: Preparing for Lifting
Safe lifting is the final technical step before removing the power head.
Lifting preparation requirements:
- Identify and confirm correct lifting points
- Ensure the crawler tracks and sliding ears remain horizontal during lifting
- Maintain balanced load conditions throughout the hoisting process
Correct lifting posture reduces stress on structural components and improves safety.
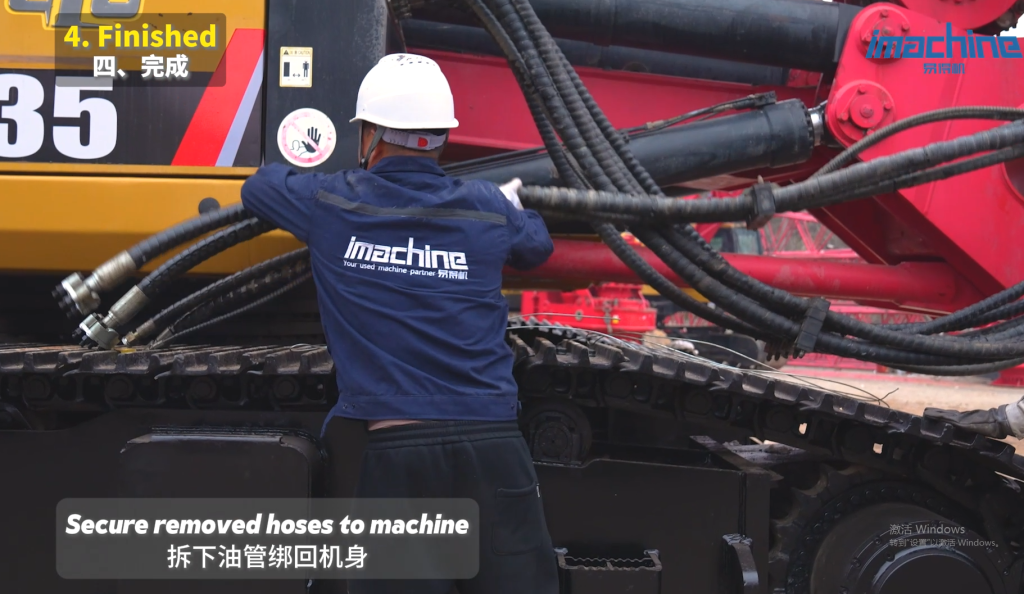
Step 4: Completion of Power Head Removal
After the power head is fully removed:
- Secure and bind the detached hydraulic hoses back onto the machine body
- Inspect all exposed interfaces and sealing points
At this stage, the rotary drilling rig power head disassembly process is complete, and the machine is ready for further maintenance or replacement work.
Final Notes of Rotary drilling rig power head Removal
It should always be performed by trained technicians following standard procedures. Attention to safety preparation, hydraulic cleanliness, and lifting balance can significantly reduce downtime and maintenance risks.